$ 0016. Use MongoDB Container with Django
| Author | luna-negra |
| Created On | 2024-11-11 10:56:00+00:00 |
| Edited On | 2024-11-11 11:08:00+00:00 |
| Tags | #django #settings #mongodb |
I. Preview
Django is a web framework. In this reason, Django should have DBMS to save its data created between server and client. Basically, Django provide a SQLite for its database, so if you start your django project from the scratch, you can see the file 'db.sqlite3' in your project folder.
However, There is a lot of problem to use SQLite for a product. First of all, SQLite does not have any security settings and save its data as a file - db.sqlite3 - without encryption. There for the file, SQLite created can be read to everybody. Everyone can access this file and read its contents without authentication process. For this reason, Django engineer use SQLite only in developing or debugging work.
Second, it becomes more difficult to save data with a specific relation. Because most data recently created are unstructured, so these data can not be stored in a Relational Database. The SQLite is also one of Relational DBMS, so you can not also use SQLite if you are going to save unformatted data.
How can we solve this issue when we use django? My answer is using MongoDB in your Django project.
MongoDB is a NoSQL and document-orientated DBMS. It saves data with json-like format and therefore mongodb can save unstructured data very easily. MongoDB save its data as a file like SQLite, but MongoDB do transform its data to binary format. So If the third party person get your mongodb file, he or she can not see the contents in easy way.
When it comes to the security, MongoDB is better than SQLite. MongoDB can create a user and custom role, so it is useful to control user to access its database.
II. Prerequisite for Docker
[ Be Advised ]
- I am using MongoDB with docker container and will demonstrate how to connect django and Mongo DB as a basic level.
- If you don't have any docker in your machine, please follow the reference to install docker.
1. Pull MongoDB Image
1
2
: "pull mongodb image from the official docker hub site."
sudo docker pull mongo
2. Run Mongo Container
1
2
3
4
5
: "run mongo container."
sudo docker run -d --name mongo \
                   --hostname mongo \
                   --publish 27017:27017 \
                   mongo
3. Check the Access to Mongo Container
[ In Local ]
1
2
: "run mongo container."
sudo docker exec -it mongo mongosh
If there is no issue, you can see some MongoDB' logs and DB prompt with 'test>'

[ Check the Port from the Remote ]
1
2
: "check the Mongo DB' port is open"
curl -v telnet://[IP_ADDRESS]:[PORT]

4. Create a Superuser
In MongoDB container, you have to create superuser account. This superuser can create another user, role, db and collection(table).
1
2
3
4
5
6
7
8
9
10
11
: "move to admin database"
use admin

: "create a superuser account"
db.createUser({
  user: 'USERNAME',
  pwd: passwordPrompt(),
  roles: [
    { role: 'root', db: "admin" }
  ]
})
* You can enter the password string instead of passwordPrompt().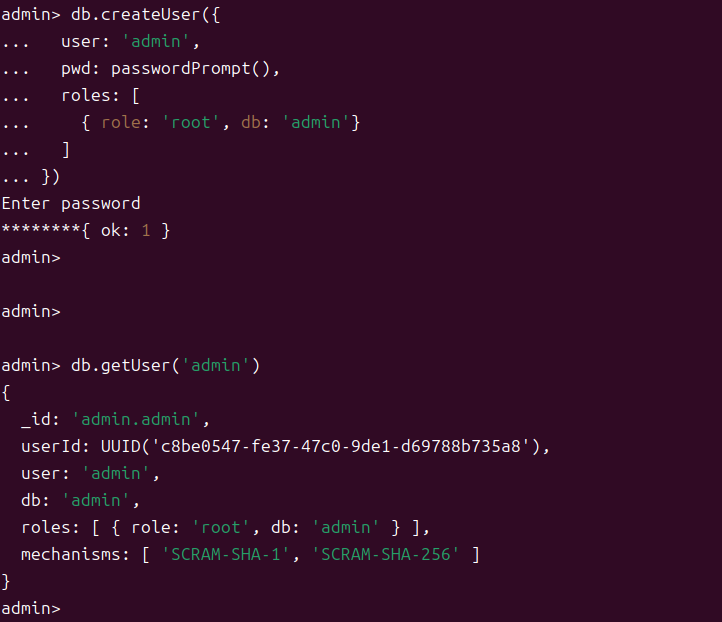
Now you have a superuser 'admin' in your Mongo DB Server. If you see the new account was created, logout with 'exit' command and re-login with command below
1
2
3
4
5
: "log out MongoDB"
exit

: "login MongoDB with superuser account"
sudo docker exec -it mongo mongosh -u USERNAME -p -authenticationDatabase admin
* You can assign your password after option '-p'5. Create a Database and User for DB
I am about to save the user input data in 'django' Database in Mongo DB. To this, I will create new database named 'django', and create another user to read and write 'django' database.
1
2
3
4
5
6
7
8
9
10
11
12
13
14
: "create new database"
use django

: "create a new user with rw permission"
db.createUser({
  user: 'USERNAME',
  pwd: passwordPrompt(),
  roles: [
    { role: "dbOwner", db: "django" }
  ]
})

: "if you need to create a collection with superuser"
db.createCollection("[COLLECTION_NAME]")
*  'use' command includes 'create database' implicitly.
*  When you name the database, I recommend you to name it with project name.
*  All class name in models.py will be a collection name (table name) in Mongo DB.
*  If you did not create any collection with superuser, new user's permission must be 'dbOwner'.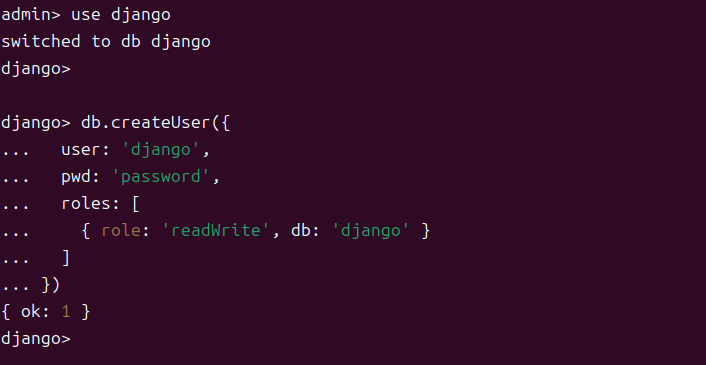
III. Django Setting
As a default, Django does not provide any engine for MongoDB, so you have to install python package 'mongoengine' first.
1. Install ‘mongoengine’ Python Package.
1
2
: "install 'mongoengine'"
sudo pip install mongoengine
2. Connection Setting.
After installation, open the 'settings.py' folder and add some lines.
1
2
3
4
5
6
7
8
9
10
11
12
// settings.py
// import mongoengine
import mongoengine as mg
...

//connect to database
mg.connect(
  {
     db: "[DB_USERNAME]",
     host: "mongodb://[DB_USERNAME]:[USER_PASSWORD]@[IP_ADDRESS]:[PORT]/[DB_NAME]?authSource=[DB_NAME]"
)
...
3. Create a models.py
Although MongoDB is a non-relational DBMS, Django require a basic relation to save a data. Therefore, I have to fill models.py file out with lines to save member's account.
1
2
3
4
5
6
7
8
9
10
11
12
// models.py in application file
// import mongoengine
import mongoengine as mg

class User(mg.Document):
    email = mg.EmailField(required=True, unique=True, primary_key=True)
    password = mg.StringField(required=True, unique=False)
    created_at = mg.DateTimeField(auto_now_add=True)

    def __str__(self):
        return self.email
...
*  The class name will be a collection name in Database 'django'
*  You don't have to migrate a database because MongoDB does not require to create table.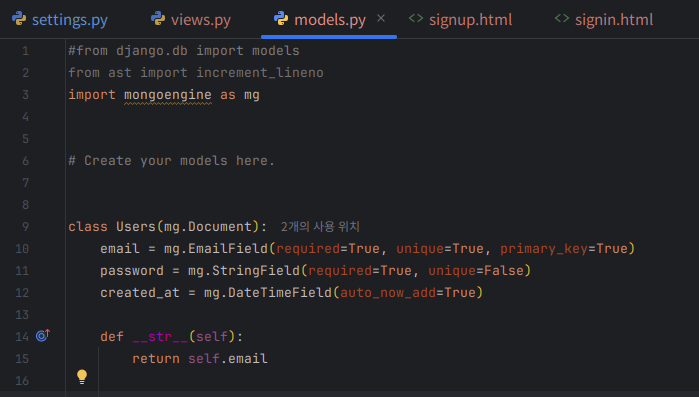
[Be Advised]
Django’s authentication framework typically requires using django.contrib.auth and the default User model.
However, with MongoEngine, you’ll need to create a custom authentication mechanism,
as MongoDB is not directly compatible with Django’s ORM-based User model.
4. Test to Save Input Data
I will creat a new user for my Django project, which connects to Mongo DB container. To this, I will open the login page in my browser and do a sign up process.
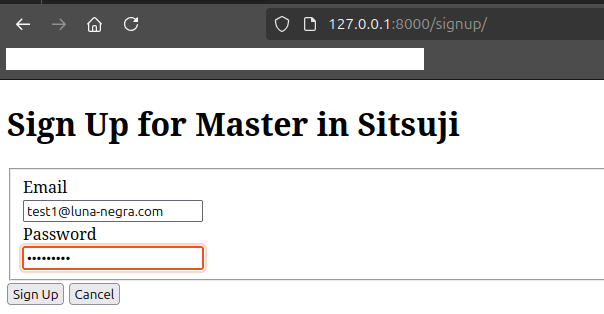

If the web page does not print out any error, please check whether the data was saved in Mongo DB.
1
2
3
4
5
6
7
8
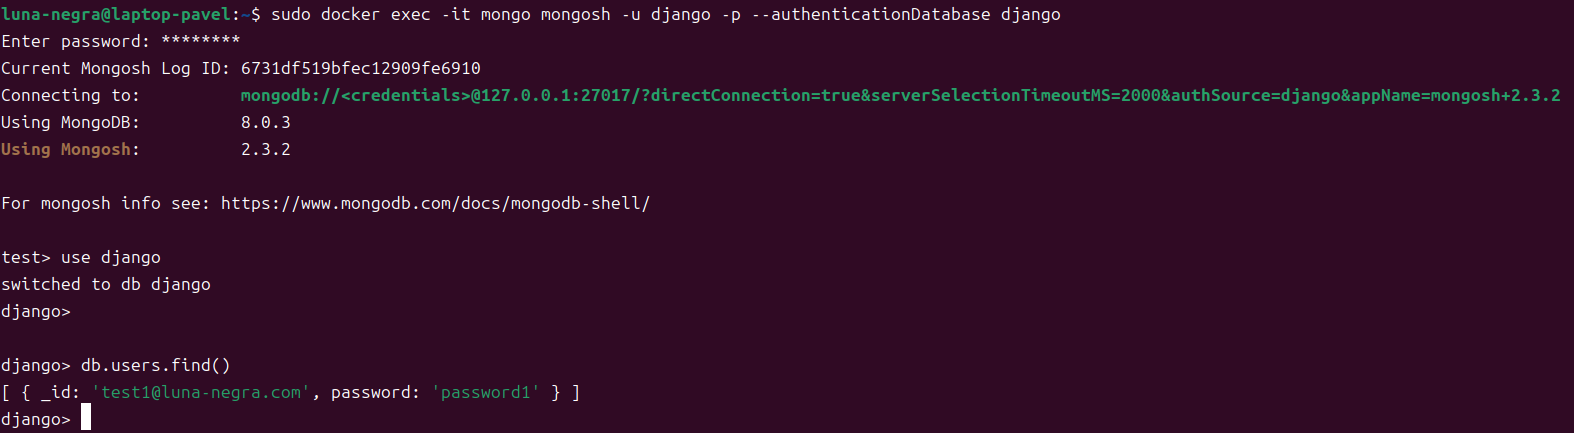
: "login Mongo DB with DB Account"
sudo docker exec -it mongo mongosh -u USERNAME -p --authenticationDatabase DB_NAME
: "move to DB"
use DB_NAME
: "show all documents"
db.COLLECTION_NAME.find()
IV. Preview