$ 0015. Sending Mail in Django with Google AppPass
| Author | luna-negra |
| Created On | 2024-09-30 07:25:00+00:00 |
| Edited On | 2024-10-01 03:12:00+00:00 |
| Tags | #django #send mail #google SMTP #relay server #app password #protocol |
I. Preview
If you are planning to create a web server with django, and want to send email from your server, you can use sending mail function which is one of the functions that Django provides. You can also use your own DNS server as a relay server, however you have to apply SPF, DKIM and DMARC on your DNS and register your domain to the official hosting service.
SPF, DKIM and DMARC should be configured to send your mail to global mail server, preventing the spam mail server. Therefore, with your custom server without 3 things above, you can only send your mail on your intra network.
Though, Most web server are targeting the users in the Internet, your web server should send your admin mail to the user without any problems. Fortunately, Google give a function called 'App Password' and you can use google's mail server as a relay server.
II. Prerequisite
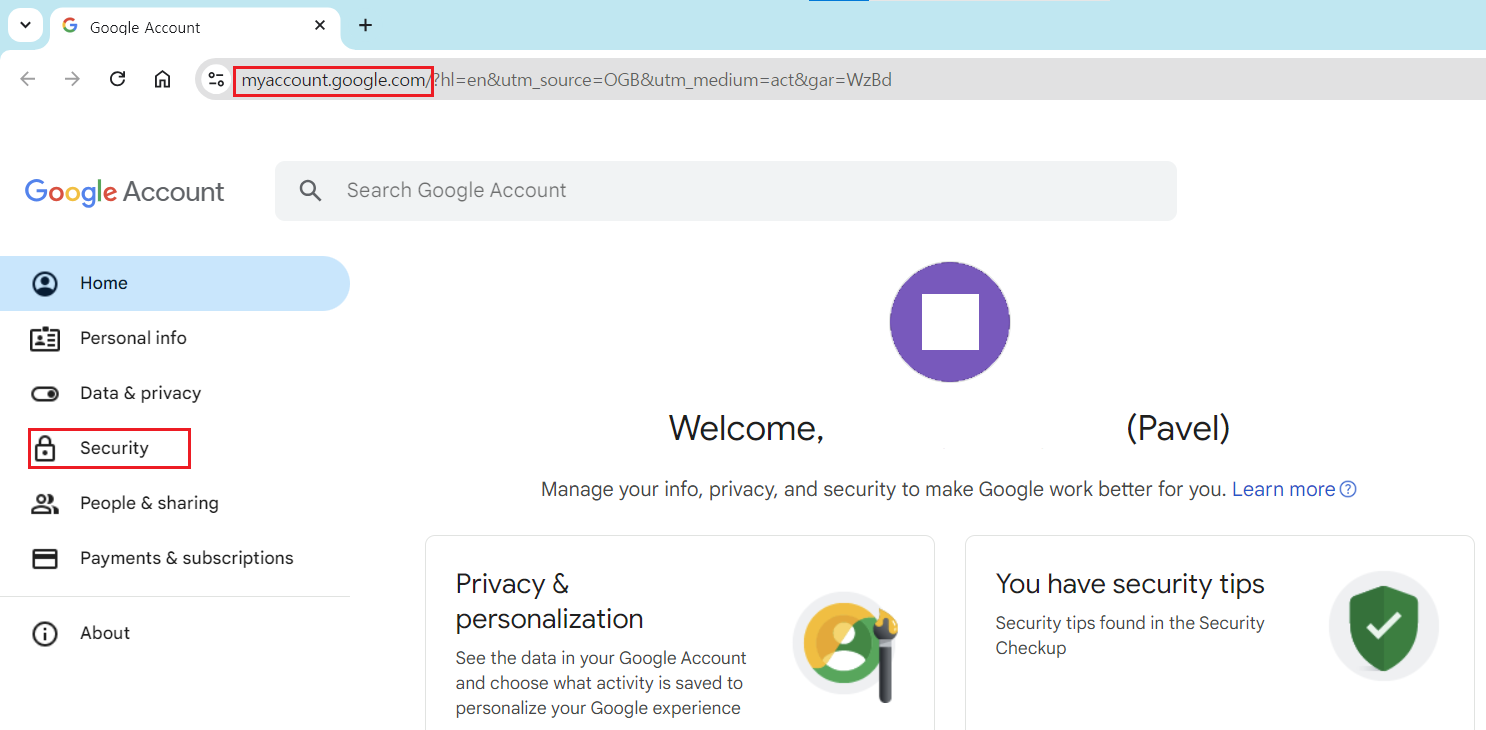
To use App Password function provided by google, you have to change some configuration for your google's accounts. First, move to the admin site of your google account. - myaccount.google.com. Once it is done, click the 'security' on the menu bar on the left side
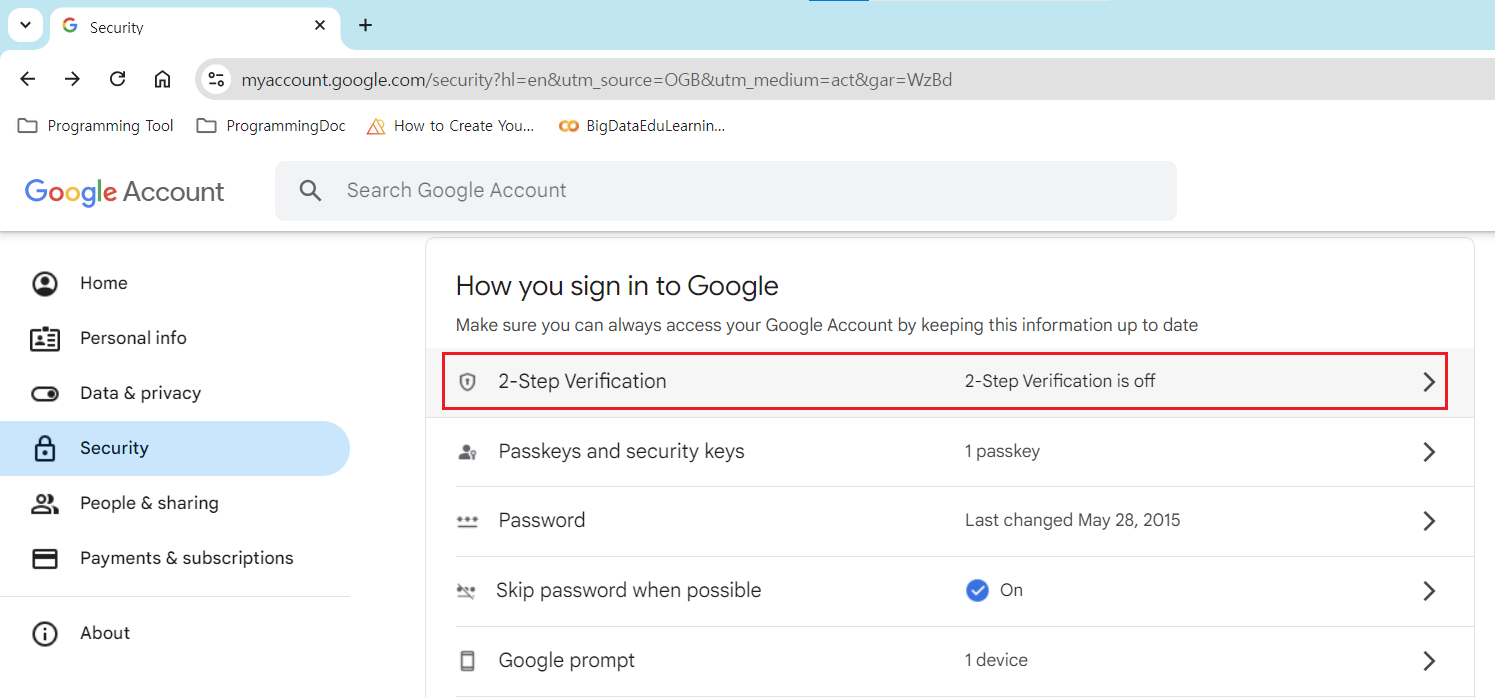
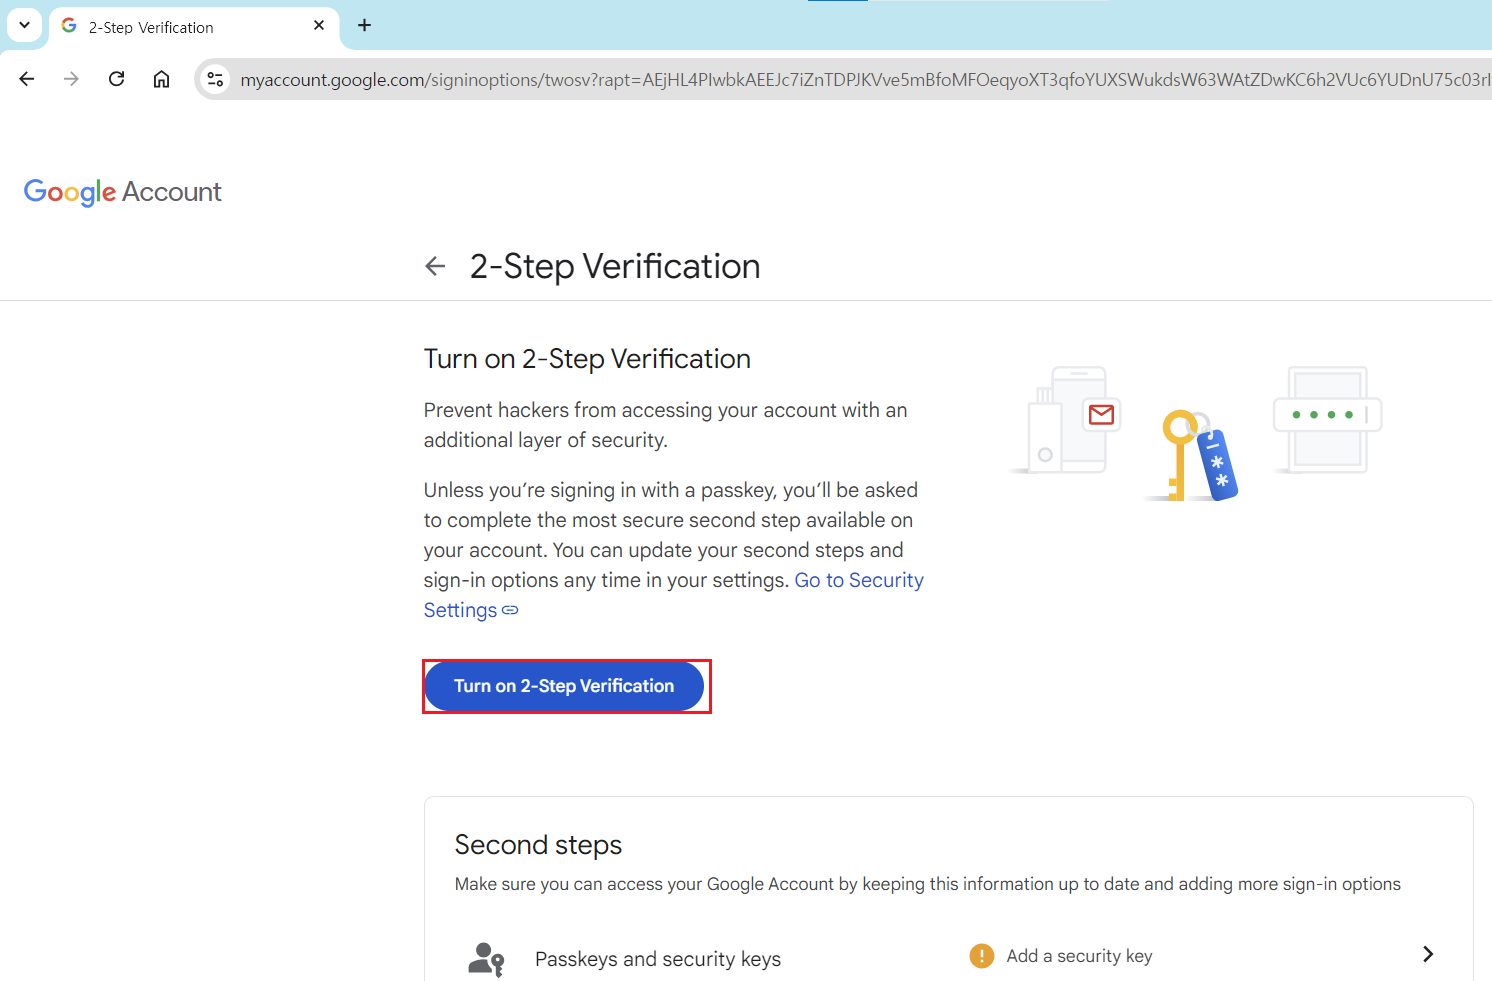
On the 'security' site, you can see the 'How you sign in to Google' on the third box from the above. In that box, click the '2-Step-Verification (a.k.a 2sv)' and turn it on to activate App Password.
After turning on the 2sv, type the 'App Password' on the search box on the top of the screen for main account site. If you did not turn the 2sv on, you can not find 'App Password' on your configuration page.
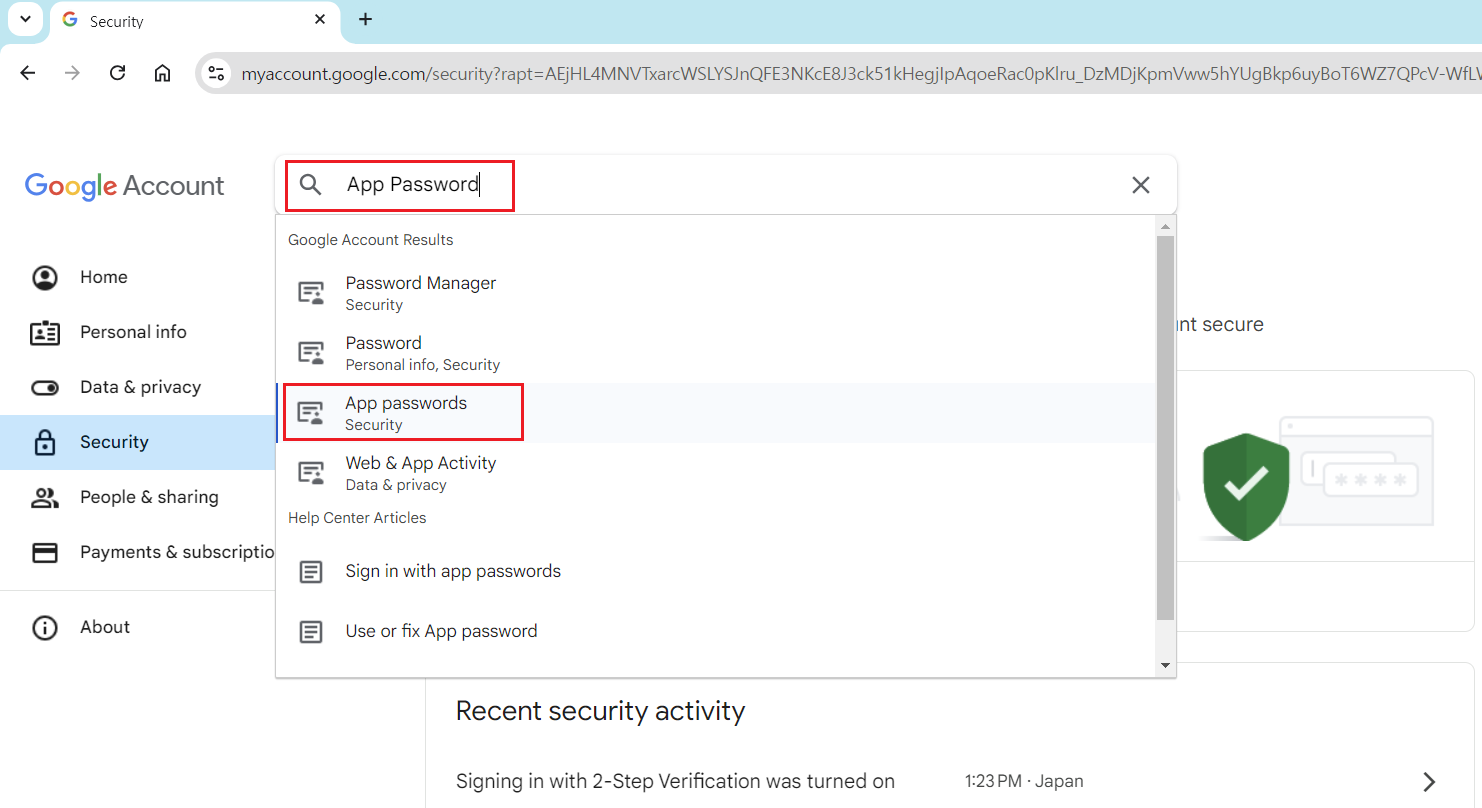
On the 'App Password' site, you should enter the name of service to issue a authentication string to use App Password. I will assign 'Django Test' for servic name.
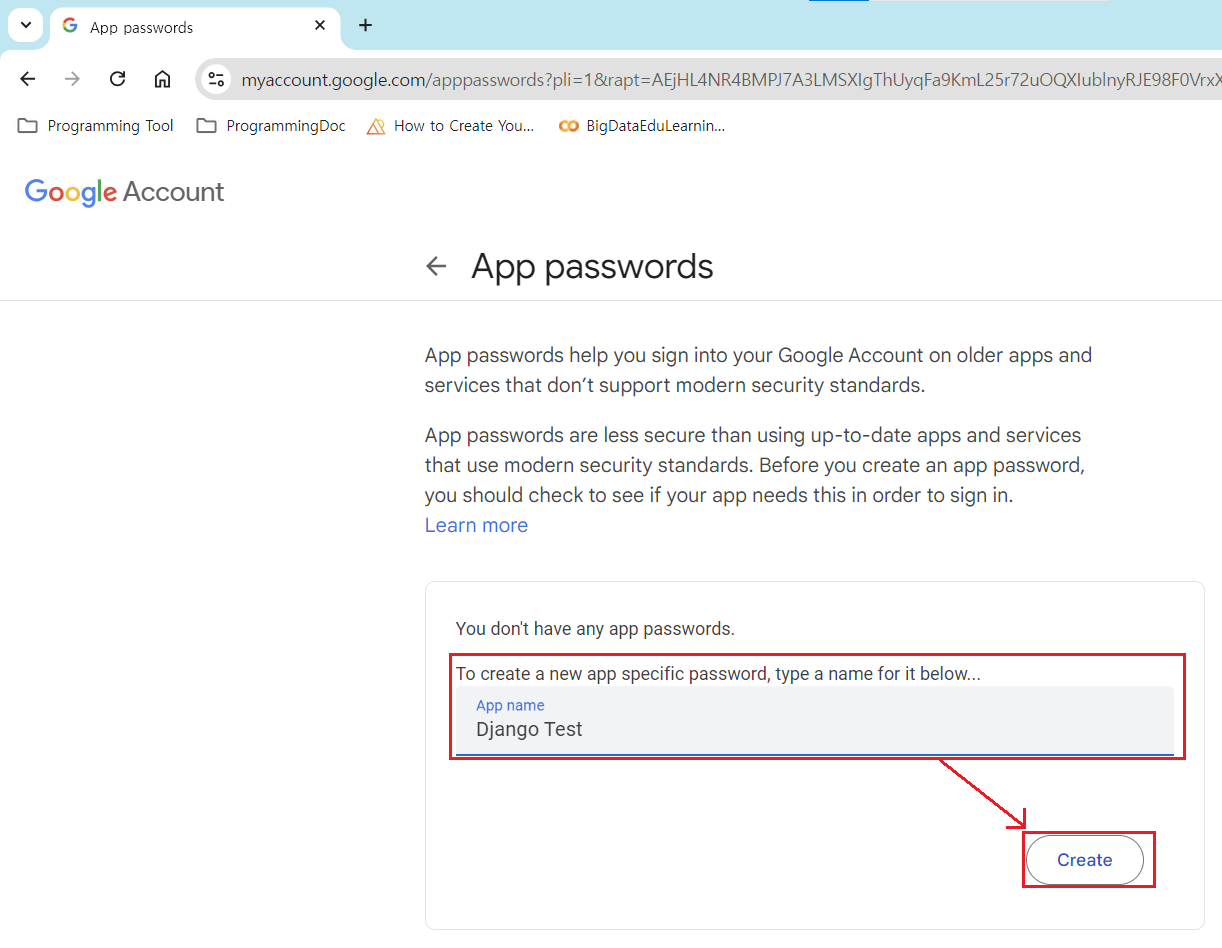
If you get 16 characters of authentication string, then you have to store it as a text file.
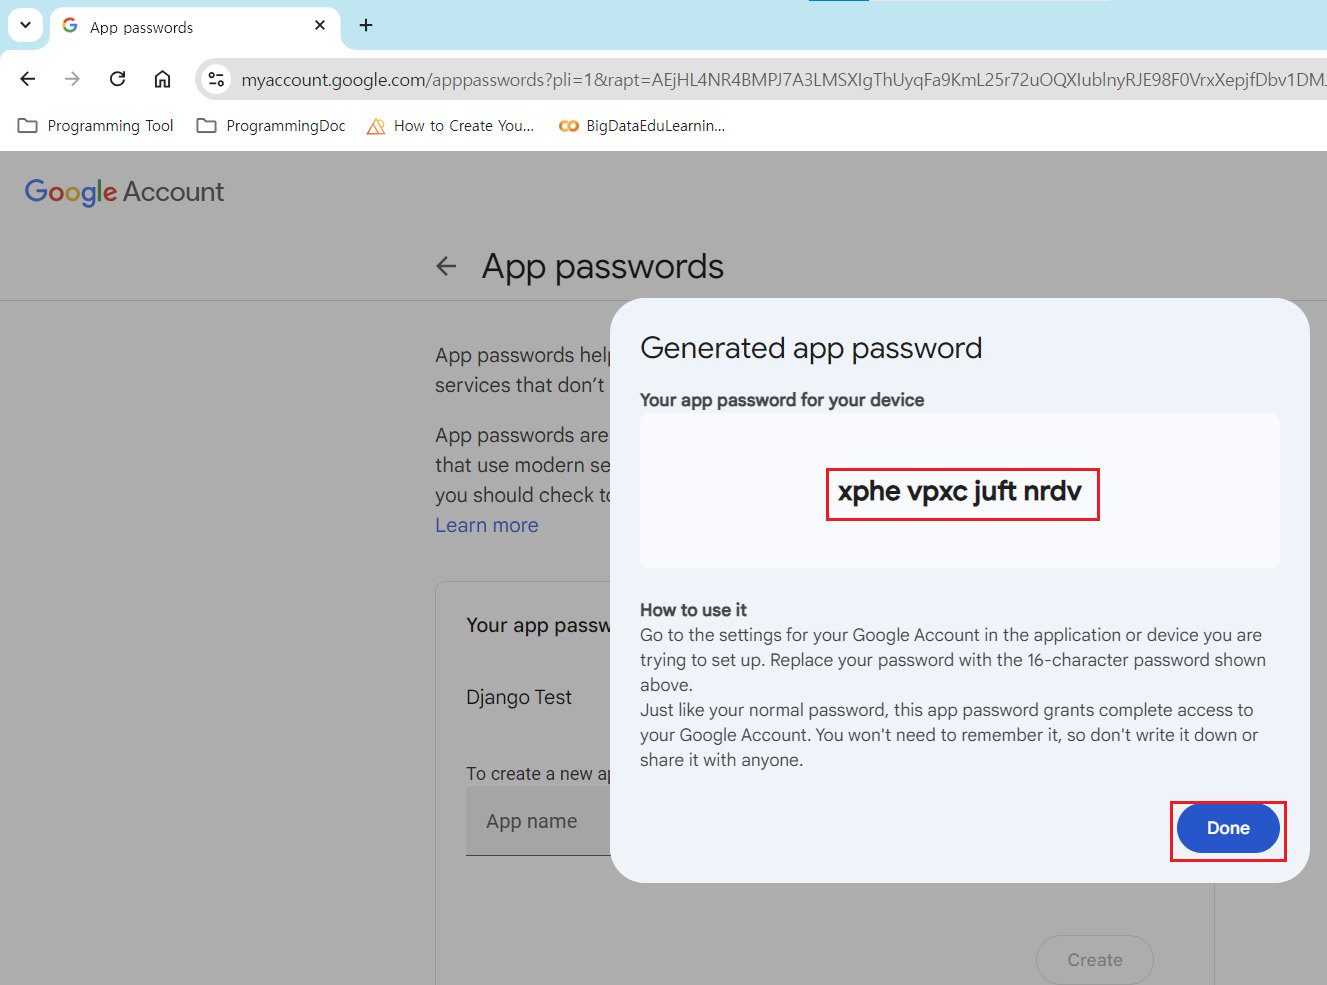
# * Please be advised that I will not use authentication string above.III. Set Django Config and Test
Now you are ready to send email from django by using Google App Password. Django also provide a function to send mail outbound by using EmailBackend class.
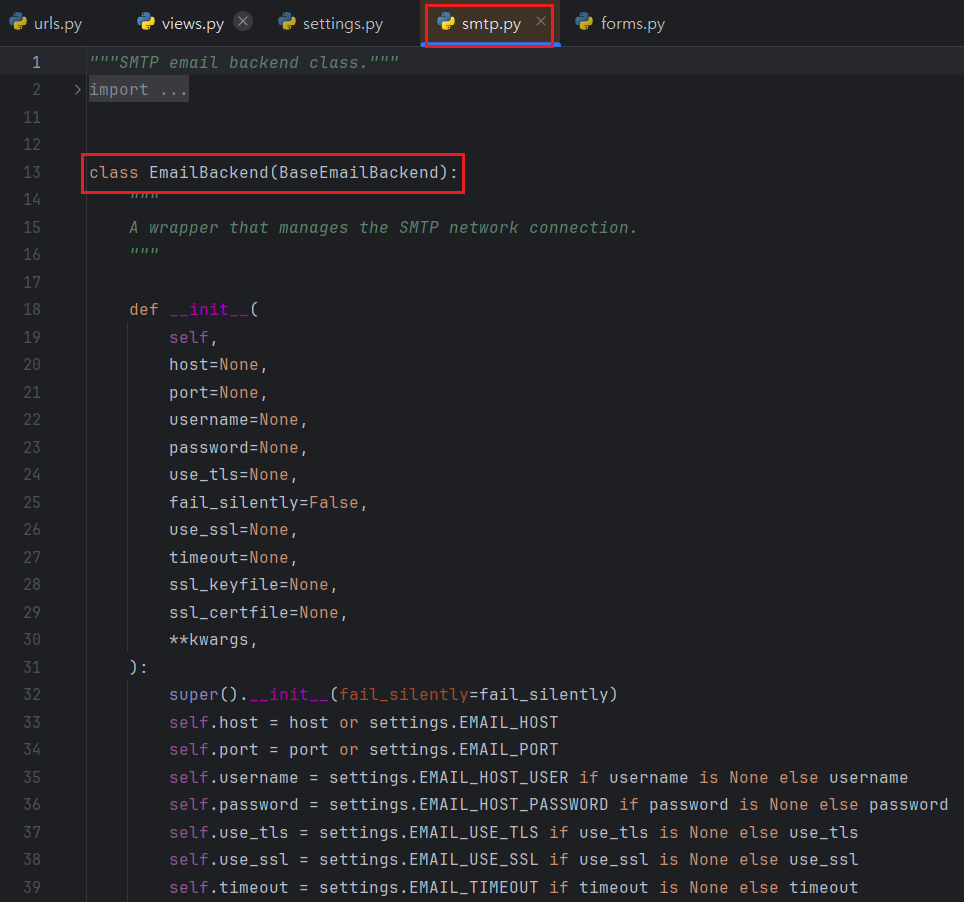
Same as another classes which are built in Django, EmailBackend class can be configured in 'settings.py' file. You can add key names related to the EmailBackend.
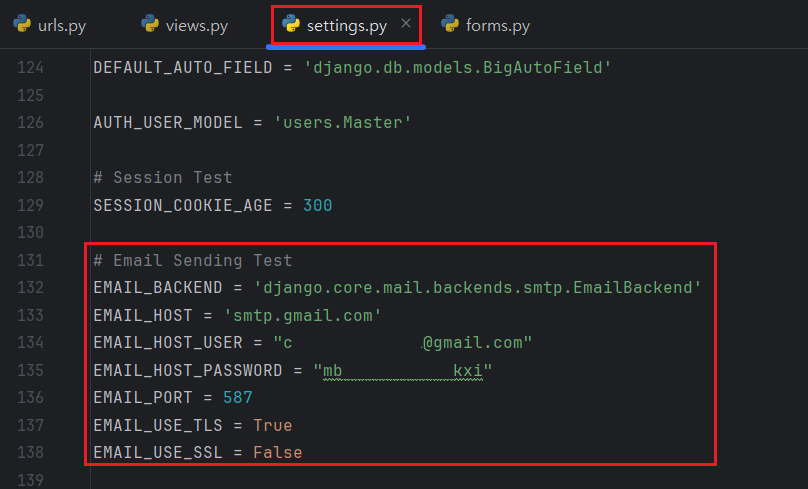
- EMAIL_BACKEND: Assign an Email Backend that you want to use. Default is 'django.core.mail.backends.smtp.EmailBackend.'
- EMAIL_HOST: Assign an mail server's FQDN or IPv4 address. Google is 'smtp.google.com'
- EMAIL_HOST_USER: Input user ID or username for mail server
- EMAIL_HOST_PASSWORD: Input the Authentication String without space for your google App Pass
- EMAIL_PORT: Set the port to communicate with mail server. Google's TLS port is 587
- EMAIL_USE_TLS: Input bool whether you use TLS or not
- EMAIL_USE_SSL: Input bool whether you use SSL or not
After configuring the settings.py for sending email, create a page to send a mail with html and django views.
1
2
3
4
5
6
7
8
9
#  [ urls.py ]
#from django.urls import path
#from users import views
#
#app_name: str = users
#urlpatterns: list = [
#  ...
#  path("sendmail/", views.senmail, name="sendmail")
#  ...
1
2
3
4
5
6
7
8
9
10
11
12
13
14
15
16
17
18
19
20
#  [ views.py ]
#from django.shortcuts import (redirect
#                             ...
#                             )
#from django.views.decorators import (...
#                  request_POST
#                  ...
#                  )
#from forms import (...
#                   sendmail
#                   ...
#                  )
# ...
#@request_POST
#def sendmail(request):
#    if request.user.email is not None:
#        send_email(email=request.user.email)
#    return redirect(to="/")
#...
#
1
2
3
4
5
6
7
8
9
10
11
12
13
14
15
16
17
18
19
# [ forms.py ]
#from datetime import datetime
#from django.core.mail import sendmail
#...
#def send_email(email: str) -> None:
# if request.user.email is not None:
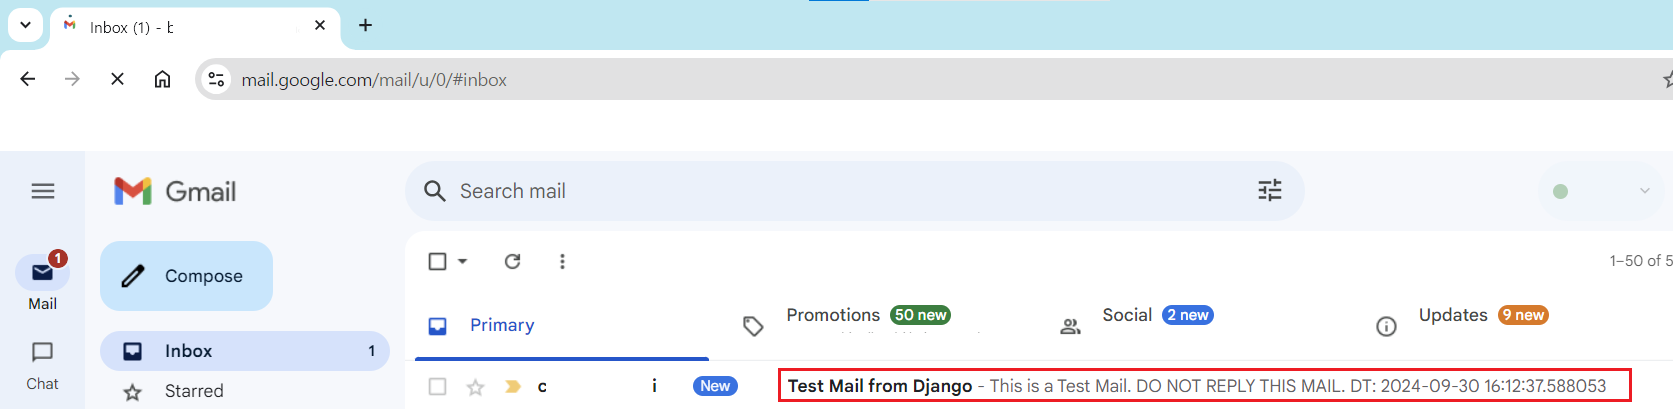
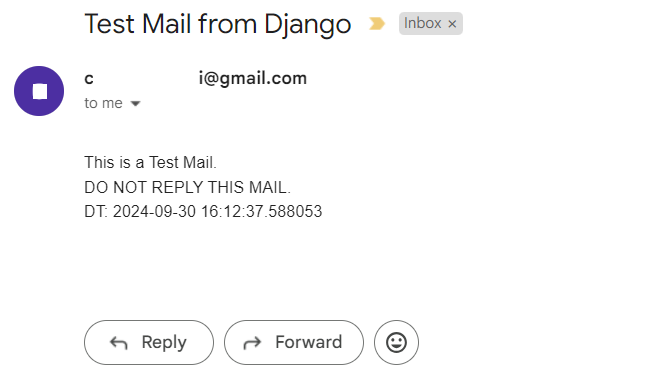
# subject: str = f"Test Mail from Django"
# message: str = f"""
#This is a Test Mail.
#DO Not Reply to this mail.
#\nDatetime: {datetime.now()}"""
# sendmail(subject=subject,
# message=message,
# from_email=None,
# recipient_email=[email],
# )
# return redirect(to="/")
#...
#
1
#  * This post assumes that you are familiar with relationship between url, view and form.
The method 'sendmail' from the django.core.email class requires subject, message, from_email and recipient_email as arguments. Subject, message require a type of string, and recipient_email requires a value as a list form which includes recipients email list. The argument 'from_email' is able to be None, because it does not affect any effects to the email if you use the google's App Password.
Finally, create a html file for user interface.

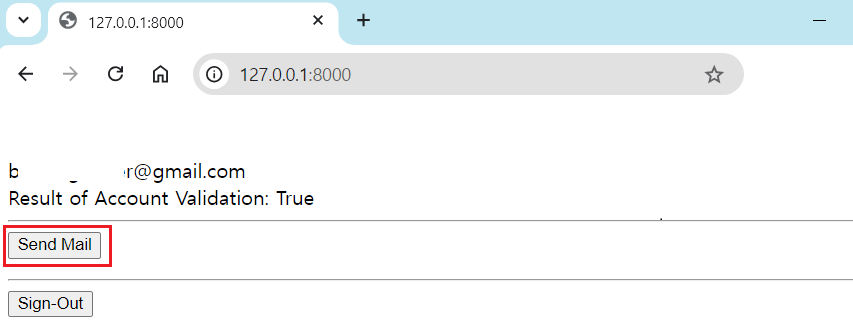
My HTML file has a logic that user can send email once the user has successfully logged in and got a session. All user in my web application has an email address. Therefore, when the users click 'sendmail' button after the sign in, they can receive the mail from my django web server.
As I mentioned above, 'from_email' argument in 'sendmail' method does not work properly with google App Password. So, If you want to assign a specific host and domain for 'from_email' you must create your own username and domain in google.
It is possible to use your own SMTP server to attach to the django. Instead, you should also have your own DNS server that can connect to the hosting server in the Internet. In addition, you also have to config some setting - SPF, DKIM and DMARC to your own DNS or mail server, or global SMTP server will block your mail from coming nowadays.
IV. References